0

Your Cart is Empty

Acrylic Pouring Mediums: How to Get Started

Acrylic Pouring Mediums: How to Get Started

Acrylic Pouring Mediums: How to get Started

If you are feeling the urge to play with paint and colour then using an acrylic paint pouring medium, also known as fluid art and liquid art, is the perfect way to start.

Acrylic pouring is a form of art that involves mixing different acrylic colours with a pouring medium and pouring directly onto the canvas without using a brush.

How to use pouring medium acrylic paint

You will need a pouring medium, like Liquitex Professional Pouring Effects Medium to mix with your fluid acrylic paints and water. Do not use heavy body acrylics as they are too thick. The consistency must be such that it flows well but is not too thin, The ratio is approx. 1:1:1. Each colour is mixed individually, together with the pouring medium and water. 


Leave these mixtures to stand for a while so that the bubbles can rise to the surface. If you start pouring right away, you will have air holes covering the surface. Some acrylic pouring artists make their mixtures one day before the actual pouring to avoid air bubbles.

Items you will need to get going are: 

  • canvas or wooden panel
  • Plastic cups for pouring (to cut down on plastic consumption, we suggest you raid your recycling bin for plastic food pots that can be washed out and then filled with your paint!)
  • You may also want to have a good pair oflatex gloves incase you want to use your hand to swipe the paint.
  • Pouring can get very messy so don’t forget to put down a plastic sheet or use a deep tray to catch the paint. 


Acrylic pouring medium techniques

Dirty Pour

With this technique, all your colours are placed into just one cup before pouring. The consistency of your paint is important as if the paint is too thin then the colours will all blend together on the canvas.When you have poured the paint onto the canvas, tilt the canvas at different angles until the surface is covered. This technique is a great way to experiment with colour and finishes.

Puddle Pour or Straight Pour

The Puddle Pour is when you add individual colours in the centre of your canvas and build up the layers as you go.Manipulate the paints by tilting the canvas to different angles, and create different effects by swiping the paint with an instrument, like a palette knife.

You can also do a wash pour with this technique, which means using quite thin paint, to create a feathery effect as shown in the video below. (video courtesy of Liquitex LQX)


Flip Cup
  • Take your cups with the pouring mixture and pour them alternately into one new, larger cup.The aim is that all colours form layers on top of each other.
  • Take your big cup and put it in the middle of the canvas without any paint spilling out.
  • Lift the cup very carefully so that the paint comes out
  • Move back and forth in a very small circle until all the paint has run out of the cup.

(Info for Flip Cup courtesy of: https://acrylgiessen.com/en/acrylic-pouring-guide/)


Why not try adding metallic acrylic inks or paint to your pour, adding using the pipette as the acrylic is still wet, giving you a multi layered piece.  


Once you have mastered the above, you may want to look at more techniques such as:

  • Dutch Pour,
  • Bottle Bottom
  • Puddle Pour 
  • Funnel Pour

Or why don’t you try differing surfaces such as Tile, Picture Frames and even your phone case, the choices are endless as long as you prepare your surface.


Acrylic Pour on Tile

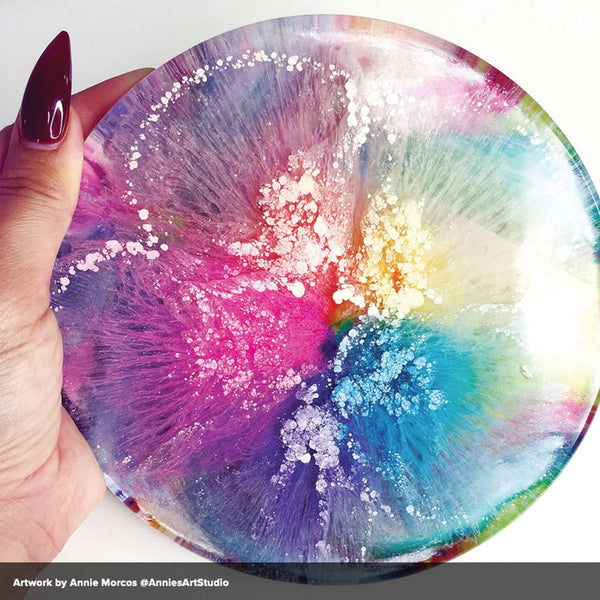
Painting on ceramic tile is a great surface to try your acrylic pouring. Tiles can make small art pieces or beautiful coasters. 

Acrylic Pouring medium Coaster Art

When pouring on tiles, ensure the surface is prepped ready to hold the paint. If you cannot source unfinished tiles we would recommend applying a layer of gesso or other primer type giving the tile an even surface for the paint to adhere to, not forgetting the sides. Many finished tiles have a shiny finish so you will need to use a heavy grit sandpaper to rough up the surface then apply a primer.

Now all you ned to do is select your colours and get pouring!

catherine peters
catherine peters


2 Responses

Lisa Dumas
Lisa Dumas

October 20, 2021

I’ve been wandering which is the best to add to your paint and pigments polypore by Vivid or liquitex pouring medium. Which one is the best for pigments and the six ounce bottles I can’t find nowhere. I forgot my other question but thank you

Jayne
Jayne

July 13, 2020

Hi there, might seem like a daft question but, no one actually states what is used on your canvas before starting to pour? I can see from various video clips that the colours are poured on to a wet surface of white-black, or whatever your preference.
Is this just acrylic paint or is it something else? and if it is just acrylic paint, are there any paint conditioners in the paint, like floetrol, please.

thank you
with Kind Regards
Jayne.

Leave a comment

Comments will be approved before showing up.


Also in ARTdiscount Blog

Celebrating Vincent van Gogh’s Sunflowers; Van Gogh: Poets and Lovers

by Ellie Jakeman September 04, 2024

The ‘Sunflower’ series of paintings by Van Gogh has inspired us to create our own themed painting using a variety of techniques, with our own ARTdiscount products.
Read More
A Brief History and Explanation of Oil Painting

by Jean Bell August 21, 2024

Oil is one of the oldest painting mediums which still sees frequent use in painting today but it has not always been as accessible as it currently is.
Read More
A guide to oil painting drying times
A Guide to Oil Paint Drying Times

by Ellie Jakeman August 21, 2024

Understanding drying times for oil colour. Explore the nuances of oil paint drying times by delving into our insightful blog.


Read More