Your Cart is Empty
A beginners guide to using pastel pencils
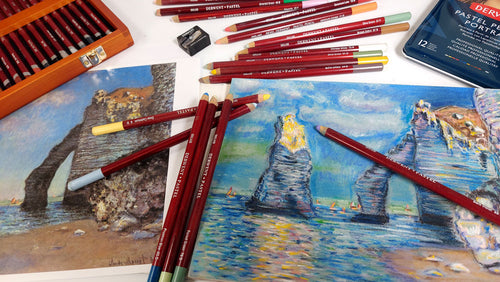
In previous articles we have discussed soft pastels as a versatile and vibrant medium. In this article we will focus on discussing pastel pencils, which are often used in conjunction with soft pastels and PanPastels to provide a more linear quality to your work.
Pastel Pencils
Using pastel pencils allows for more precision and control compared to traditional soft pastels in a stick form. However they do work hand in hand with other soft pastels both in a stick or a pan form. Different brands offer different softnesses so it is always prudent to do some research before purchasing them as there are many brands on the market such as Derwent, Caran d’Ache, and Faber-Castell Pitt. Pastel pencils can be purchased individually or in sets. Below we have provided some information on our 3 best selling Pastel Pencil brands.
Faber-Castell Pitt Pastel Pencil Tin of 60 Pencils
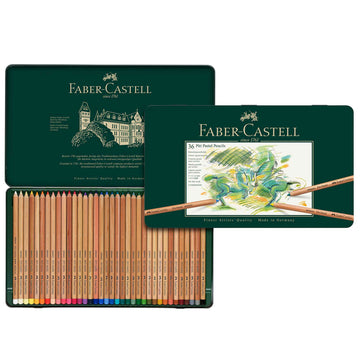
Faber-Castell PITT pastel pencils have wax-free leads; drawings can be wiped just as with pastel crayons, so your work may need to be fixed afterwards. The 60 bright colours contain a high proportion of pigment; they are highly light-fast and do not change colour appreciably when fixed. The compact pastel lead is perfect for hobby painters and professional artists, because it produces plenty of colour without being used up too fast.
Faber-Castell PITT pastel pencils are particularly suitable for opaque lines, hatching, and very fine colour transitions, but also for shading large areas. They are useful for sketches and studies, portraits, still lifes and landscapes. In combination with traditional pastels.
Faber-Castell PITT pastel pencils are excellent for elaborating details. Highlights and shadows can be added to a drawing with a pencil of slightly different shade. Particular details can be emphasised to attract attention. Faber-Castell PITT pastel pencils therefore offer many creative options, both alone and in conjunction with other materials.
Caran d'Ache Dry Pastel Pencils Box of 76 Colours
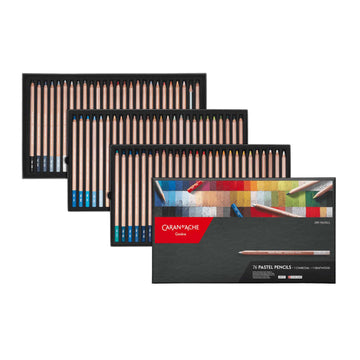
Carefully selected by leading pastel artists, this extensive Pastel Pencil assortment is intended for both beginners and the experienced, amateur or professional artists, for preliminary work and detailed finishing of a huge variety of subjects. This assortment contains 76 colours enabling pastellists to enjoy the full potential of dry pastels with a very wide range of colours. For even greater creativity, the assortment also includes one Grafwood H graphite pencil (hard lead) and a soft charcoal pencil.
- Smooth to apply and generous for blurring, strong point
- Large lead, diameter 4.7mm
- Rich texture that adheres well to the support
- Exceptional light-fastness (Standard Blue Wool Scale)
- Stable with fixative, high pigmented concentration for generous blurring
- Made in Switzerland, FSC, ASTM D-4236
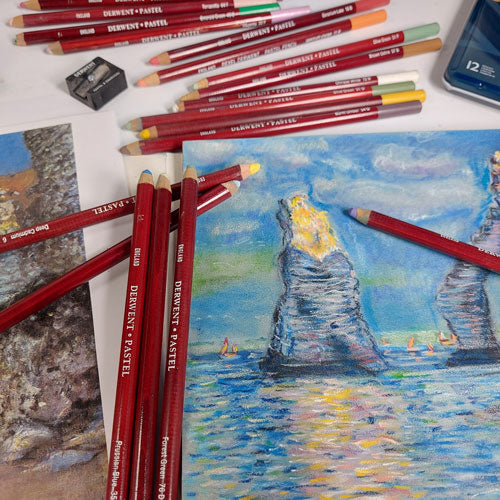
Derwent Pastel Pencil Wooden Box Set of 72

Derwent Pastel pencils provide the soft, powdery texture and velvety smooth finish of a top quality traditional pastel. But unlike conventional pastels, they are presented in a smooth roundwood case for maximum control and ease of use. The pencils are ideal for mixing and blending.
Use with a slightly textured pastel paper to get the most out of these pencils and blending brushes and paper stumps for easy and precise blending.
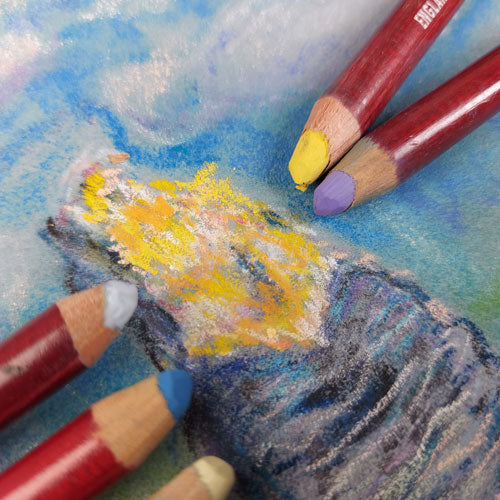
A beginners guide; tips for using Pastel Pencils
Materials you will need;
- Pastel pencils
- Pastel paper or textured paper
- Fixative spray (optional, some artists don’t fix their work as it slightly darkens the colours)
- Blending tools: fingers, blending stumps, rags or brushes
- Erasers: kneaded eraser or vinyl eraser
- Protective H & S measures: disposable gloves (wearing gloves will protect your hands from the drying properties of the pastels and also protect your artwork from the naturals oils on your fingers) apron, smock, or old clothing to protect against dust
- Hoover for picking up the dust. (Optional, some artist with respiratory conditions will find the dust particles problematic, using a hand held hoover for removal of dust is most beneficial, Pastel pencils usually create less dust than sticks)
Select your pastel paper, pastel board or textured surface:
- Pencil pastel pencils are dry and dusty so they need a good textured paper or pastel board they can bind to. Smooth paper will not work as the pastel will just fall off. Faber-Castell PITT pastel pencils are slightly harder so will create excellent sharp lines and produce less dust.
- You can prepare your own textured surface on thick watercolour paper or watercolour board, canvas or even wood panel, with GOLDEN Pastel Ground 237ml. Read all manufacturers instructions for more information on preparation. This product needs diluting but can offer a great range of coloured ground by adding some acrylic pigment.
- Choose a paper with a textured surface that can hold the pastel pigment. Pastel paper or sanded paper is ideal, but you can experiment with other textured papers as well. The deeper the tooth of the paper the more the pastel will adhere. Some papers have a coating while others have an imprint of texture.
- Toned paper is actually easier to work with as it is less intimidating than a stark white background. Toned paper can create a mid tone for your artwork and in some cases can be left exposed between your marks. Fortunately we can provide a wide range of coloured or toned pastel paper in the brands we have listed below, together with a variety of scales.
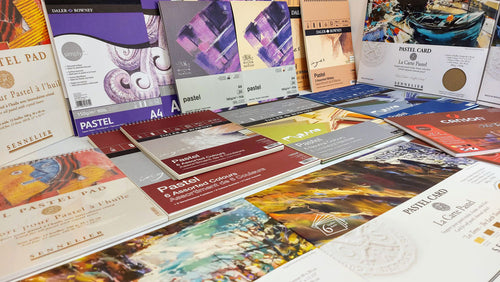
Here are some links to some great brands of pastel paper:
- Clairefontaine Pastelmat Pad Anthracite No. 6 - 30x40cm - 12 Sheets
- Clairefontaine Pastelmat Pad No.3 360gsm 30x40cm WHITE PAPER
- Daler-Rowney Ingres Spiral Pastel Pads - 6 Assorted Colours
- Daler-Rowney Murano Pastel Pads - 160gsm
- Sennelier Pastel Card 360gsm/170lb - 'The Earth Tones'
- Sennelier Pastel Card 360gsm/170lb - 'Naples Yellow'
- Sennelier Pastel Card 360gsm/170lb - 'Light Grey'
- Stifflex artWork Pastel Pad 360gsm Spiral Bound 24 x 33 cm 16 Sheets Rough Surface - Light Shades
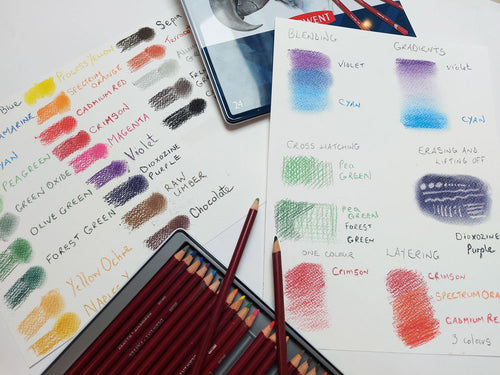
TIPS FOR BEGINNERS
Sketch or underdrawing:
Begin with a light sketch or underdrawing using a regular graphite pencil or pastel pencil. This will serve as a guideline for your pastel work. Some pastel artists create a light grid on their substrate which helps with alignment and composition, especially when working from photographs and creating animal or human portraits. If this is your fist composition, choose something simple and easy like a still life with a few well placed fruit.
Select your pastel pencils:
Pastel pencils come in a variety of colours and softnesses. Faber-Castell PITT pastel pencils are usually classed as one of the harder brands, they hold their tip for longer, are slightly less opaque, but create excellent sharp details. Caran d’Ache Pastel pencils are on the softer side and lay down a softer more opaque pigment, but their points wear down much quicker.
When choosing the colours you need for your artwork, it's a good idea to start with a basic set and expand your collection as needed, most pastel pencils can be bought individually. Create a test sheet of the colours you have chosen then practise layering them up to either darken or lighten them or to create new colours..
Layering:
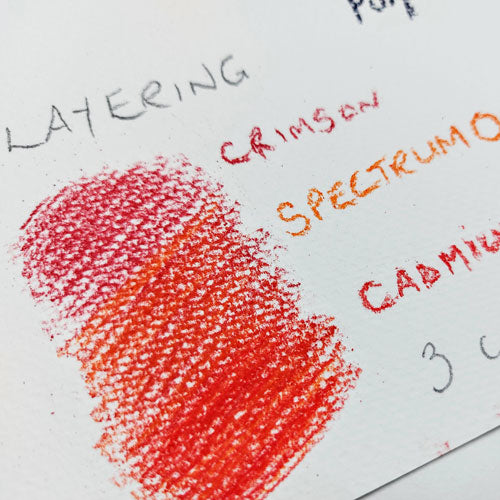
Start with a light touch when applying pastel pencil to the paper. You can gradually build up layers to achieve the desired intensity. Layering different colours on top of each other allows you to create a wide range of tones and hues. When laying down a large area of base colour, don’t apply too much pastel if you know you will be working detailed lines over the top. You will need to leave some tooth of the paper available for the top layers of pastel to adhere to.
Blending:
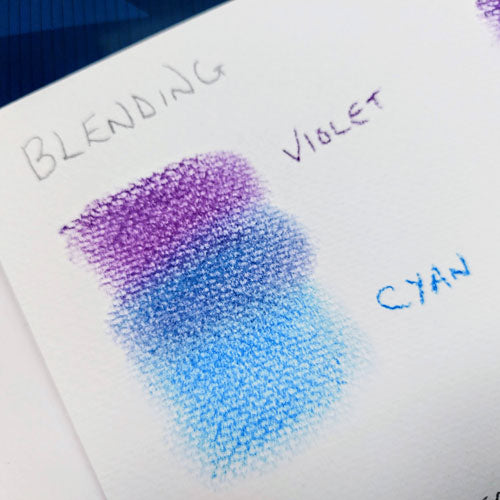
Pastel pencils can be blended to achieve smooth transitions between colours. You can use your fingers, a blending stump, or a tortillion for blending. Be careful not to overblend, as you may lose the distinct texture of the pastel.
Gradients:
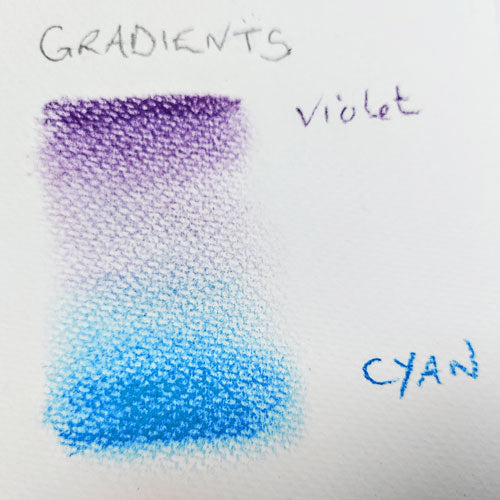
When creating gradients, you need to pay attention to the pressure you use. When working dark to light you can use a hard pressure at the top then ease off the pressure as you work down the page. Use your fingers or a soft sponge to blend your pastels working from dark to light down the page. You may need to go back and add more light layers to create a perfect smooth transition. When using two colours start at one end slighter firmer with pressure, getting lighter towards the middle, then with the other colour use a light pressure over the first colour in the middle, then add more pressure as you move away from the middle to darken the colour. Blend colours with your fingers or sponge. Again if you need a more pigmented look add more pastel in light layers then blend.
Cross-Hatching:
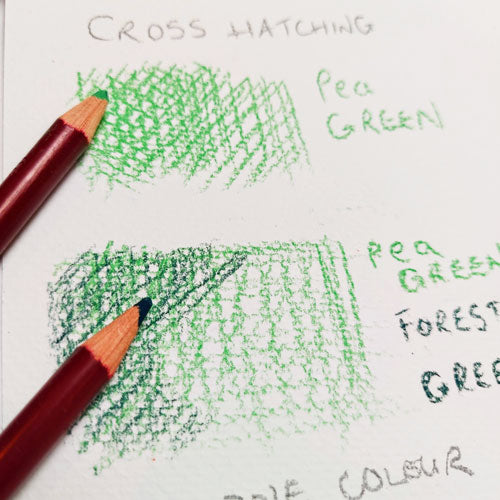
Create depth and texture by using cross-hatching or hatching techniques. This involves drawing parallel or crisscrossing lines to build up tones.
Detailing:
Pastel pencils are excellent for adding fine details to your artwork. Use a sharp pencil to draw lines, add texture, or emphasise specific features. Faber-Castell PITT pastel pencils are a good choice for sharp details.
Erasing and Lifting Off:
Correct mistakes or create highlights by using a kneaded eraser or a vinyl eraser. Harder Pastel pencils can be erased more easily than soft pastels. If you feel you have applied too much soft pastel as a base layer, use your kneaded eraser to lift some of the pigment.

Sharp Pencil Tips:
Keep your pastel pencil tip sharp for detailed work. Regular pencil sharpeners work well for the harder Faber-Castell Pitt pastel pencils but may break the inner core of the softer pastel pencils. To ensure your pencil won’t crumble you could use the Derwent Pastel & Charcoal Pencil Sharpener. If you require a very sharp point, using a stanley knife to sharpen is effective but be mindful of the sharp blade and some artists also use sand paper just to finish off the tip of the pencil. Don’t have your point too long as it might crumble. Disposable nail files also work for creating a pointed end.
Protect Your Work:
Pastel works can be delicate, so consider using a fixative and framing your artwork under glass to protect it. It is also advisable to cover your artwork with either a sheet of Glassine paper, crystal paper, tracing paper or vellum to keep it safe from smudging whilst storing your artwork. Many of the pastel paper pads actually provide these protective sheets in between the paper already. If you are using separate sheets of pastel paper, once covered with your protective paper, you can either sandwich between two acid free foam boards or place your artwork in an acid free plastic wallet.
Fixatives:
Once your pastel drawing is complete, consider using a fixative spray to set the pastel and prevent smudging. Follow the instructions on the fixative product for proper application. Fixatives can unfortunately darken your pastel pencil work if you apply too much or are too close to your work. Aim to use light strokes moving across your image from edge to edge. You can also apply fixative coats whilst working, between your Pastel layers to ensure a smudge free finish.
Clean Hands:
Pastel work can be messy. Keep a tissue or rag nearby to clean your hands as needed. Some pastel artists wear protective gloves.
Experiment and Practice:
Explore different techniques, colour combinations, and subjects to improve your skills with pastel pencils. Like any art medium, practice is key to mastering the technique.
Remember that pastel pencils offer a great balance between the precision of a pencil and the rich colours of pastels. Experiment with different approaches to find a style that suits your preferences.
Remember to enjoy the process and feel free to explore different approaches to find a style that suits you.
ACCESSORIES FOR PASTEL PENCILS
Derwent Pencil Extenders Pack of 2
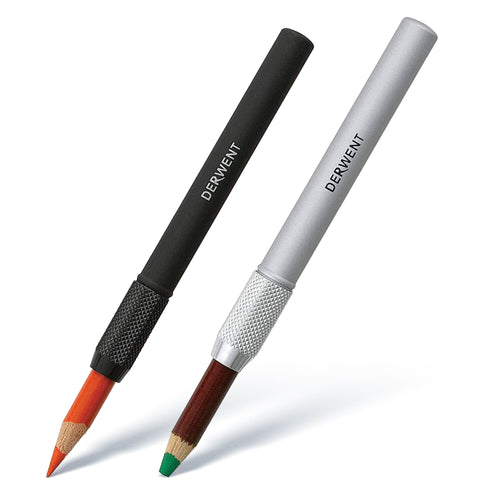
These are an essential part of your kit as they extend the lifespan of pencil ends and continue to use snapped and extensively-sharpened pencils with these handy drawing tools. Simply insert the pencil into these extenders to gain a more ergonomic grip than you would otherwise get from a pencil at the end of its lead.
Contains two sizes: The silver extender is for larger sized pencils up to 8mm such as Derwent Pastel Pencils, and Coloursoft. The black extender is for standard sized pencils up to 7mm such as Derwent Graphic, Watercolour and Studio Pencils.
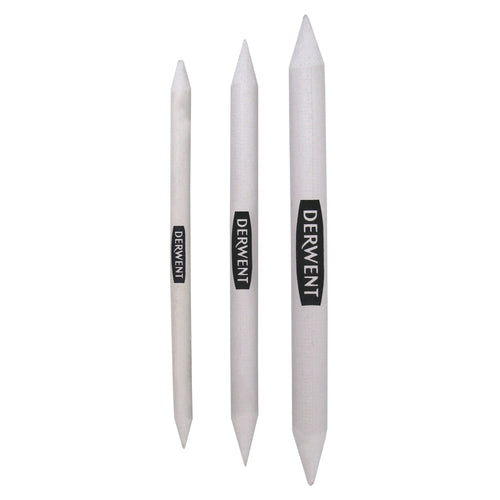
Derwent Paper Stumps Set of 3
Derwent Paper Stumps are perfect for blending dusty and chalky media. If you are working with pastel, charcoal, or graphite, the paper stump makes the difficult job of blending these mediums much easier and cleaner.Paper Stumps are perfect for accurate blending, once the stumps get dirty and the points wear down they can be easily cleaned and re-pointed using a sandpaper block.The paper stumps are made from compressed rice paper and with a point at each end. The use of rice paper ensures that the paper stumps blend more effectively and provide an even smoother finish. The points mean the stumps can be used to tackle even the smallest area of detail.These Derwent Paper Stumps are in a handy pack of three sizes, ranging in diameter from 5.5mm to 10.5mm.
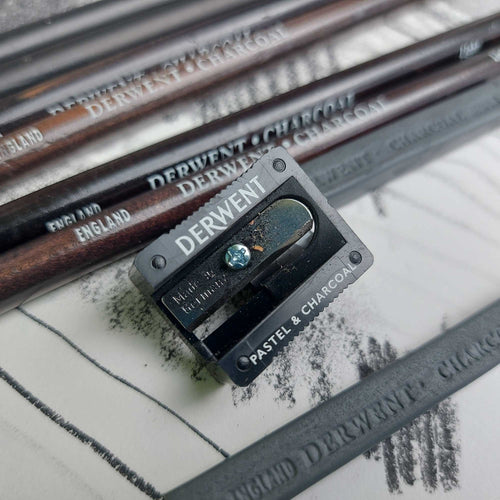
Derwent Pastel & Charcoal Pencil Sharpener
Derwent pencil sharpeners are the easy way to achieve the perfect point. The pastel sharpener is specifically designed for use with the more fragile media of pastel pencils. It is also suitable for sharpening charcoal pencils and other large diameter pencils.Ideal accessory for use with Derwent products. Compact and lightweight.
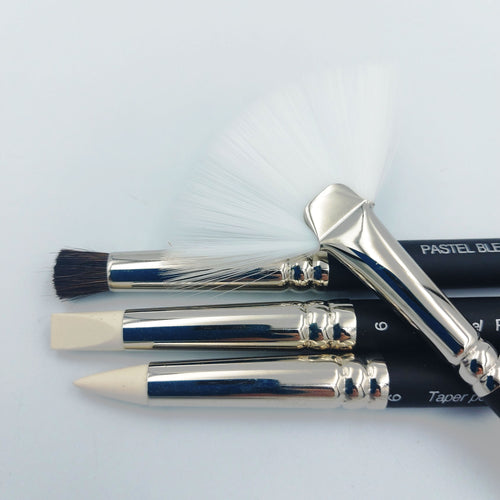
Colour Shaper Pastel Set - Size 6
Colour Shaper Pastel Set Size 6 - For work in both detailed and broad areas.A unique assortment of pastel tools selected by professional artists. Pastel Shapers and Pastel Brushes will enable pastel artists to blend, smudge, define and create a wide range of exciting effects. Easy to use and easy to clean.
Set contains:
1 No.6 Taper point - For fine detail
1 No.6 Flat chisel - Makes a flat even stroke of colour
1 No.6 Fan brush - Use for light blending of large areas, or to remove colour
1 No.6 Blender brush - Ideal for dabbing, rolling and rubbing colour
Fixatives
Utilising a fixative on your oil or soft pastel artwork upon completion is an indispensable practice that contributes significantly to the preservation and durability of the piece. Both oil and soft pastels have a tendency to remain somewhat malleable and can easily smudge or transfer if not properly secured. Applying a fixative creates a protective barrier, preventing any unintended blending or deterioration of the vibrant pigments. This not only ensures the longevity of the artwork but also allows for safer handling and framing.
The fixative serves as a crucial final touch, encapsulating the richness and texture of the pastel strokes while safeguarding the integrity of the composition. In essence, the application of a fixative is a key step in maintaining the visual impact and quality of oil or soft pastel artworks over time. Always follow the manufacturer's instructions in order to ensure proper use.
Some pastel artists however choose not to fix their work as some fixatives can darken the colour of the pastels. Practising spraying the fixative on a spare sketch will help you decide on your artwork's finished look .
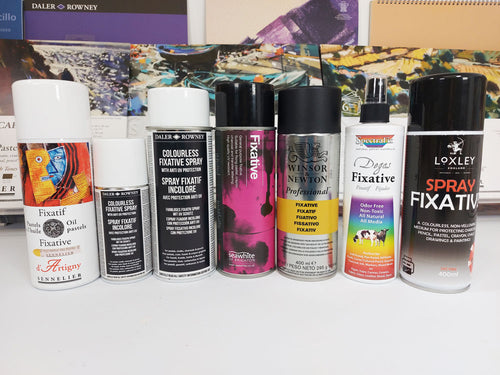
- Sennelier d'Artigny Fixative for Oil Pastels 400ml
- SpectraFix Degas Pastel Fixative
- Seawhite Clear Fixative Spray 400ml
- Winsor & Newton Professional Fixative - 400ml
- Loxley Aerosol Fixative 400ml with a U.V. Filter
- Daler-Rowney Colourless Perfix Fixative Spray With Anti UV Protection
Enjoy the creative journey of using Pastels and don’t forget to share your work with us on our social Media platforms, we love to see your creative adventures.


